Using Code Editor for custom Product Themes
- EARLY ACCESS:
- If you're interested in using this feature and you're on the Enterprise plan, please reach out to your success manager, who will activate this for you.
- Not all available variables are listed as imported attributes in this article. This list is updated as soon as the feature is released officially.
---
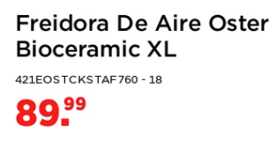
You can add dynamic content to your online publications by having the Product hotspots render the product details directly onto the page. Click here to learn more about adding dynamic content.
Using the Product Theme Editor, you change what product details to show dynamically and customize the layout of the details to match your brand's look and feel. Using HTML and CSS you can change the color and size of the text, add shapes, use custom fonts, and more. You create and store different themes, allowing you to use dynamic content in different applications and support playful designs.
Using the Product Theme Editor requires a good understanding of HTML and CSS. If you need help, our Services team is happy to create new themes for you, in which case you can contact your Success Manager for an introduction.
Product themes can also be customized without the code. For more information, click here
In this article:
- Accessing the Code Editor
- Creating and updating Product Themes
- Available variables
- Available processor functions
- Using CSS
- Using custom fonts
- Tips and tricks
- Examples
The Code Editor:
Accessing the Code Editor
You can open the Code editor by clicking on the </> symbol in the bottom right corner of the hotspot editor.
Accessing the Code Editor: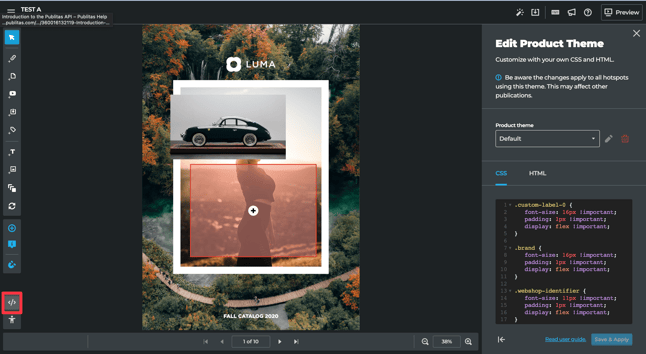
Creating and updating Product Themes
After accessing the editor, you can select a theme to edit from the dropdown list. At the bottom of the list, you'll find the option to create a new theme. After giving the new theme a name, it will be added to the list.
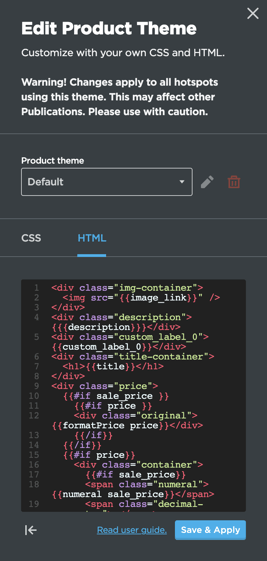
Each Theme consists of an HTML and CSS section. Use the HTML section to determine what elements to include in the Theme. Use the CSS section to adjust the appearance of the selected elements. Using CSS in the HTML section and vice versa is not supported.
Creating a new Product Theme: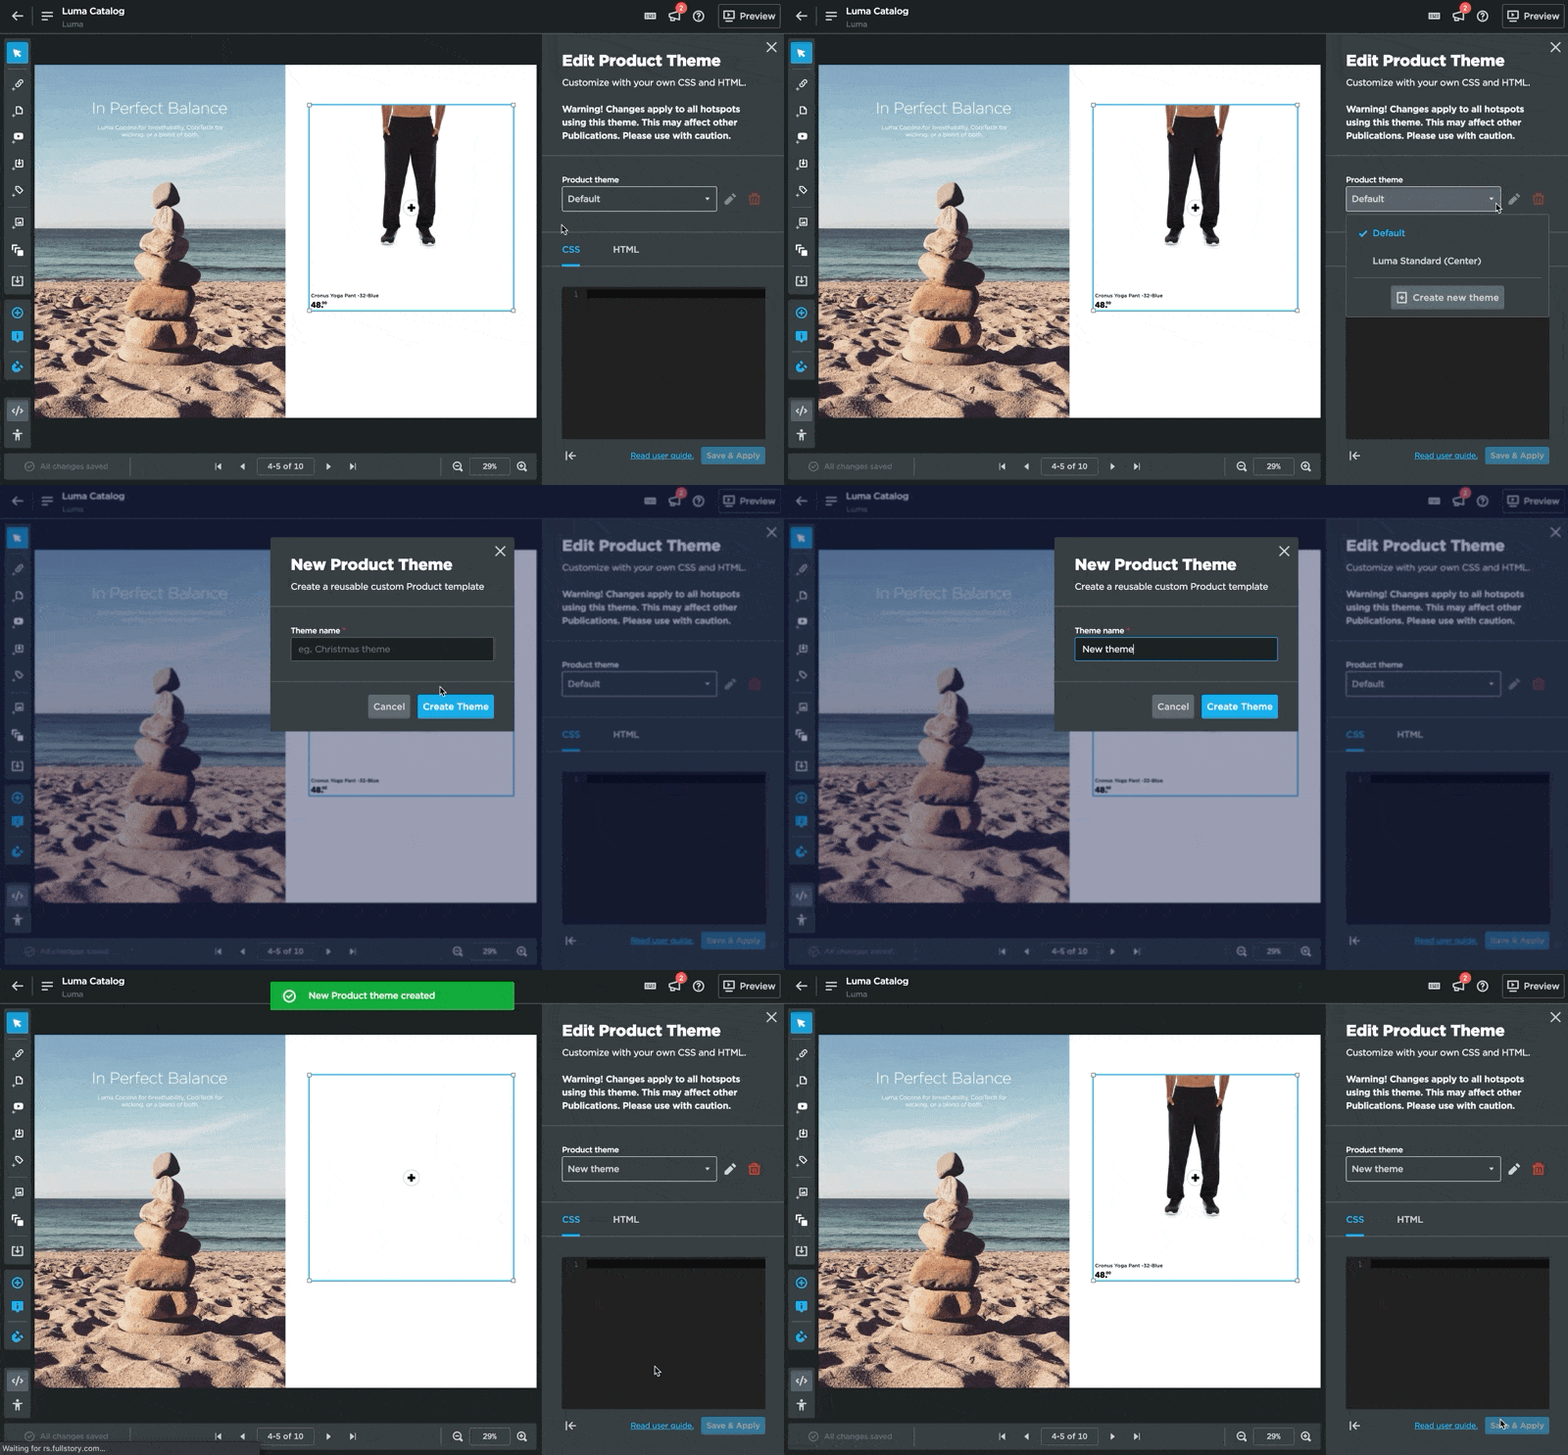
Next to the dropdown, you'll find options to rename or delete a theme.
Available variables
The HTML section determines the order in which elements appear on the page and the elements used in the layout. To load dynamic content, you can select from the following variables:
- {{id}}
- {{title}}
- {{description}}
- {{link}}
- {{image_link}}
- {{availability}}
- {{price}}
- {{sale_price}}
- {{effective_sale_price}}
- {{discount_percentage}}
- {{product_type}}
- {{brand}}
- {{gtin}}
- {{mpn}}
- {{custom_label_0}}
- {{custom_label_1}}
- {{custom_label_2}}
- {{custom_label_3}}
- {{custom_label_4}}
IMPORTANT: Whether a variable contains content depends on whether it is available in the product feed connected to the associated group. The {{effective_sale_price}} variable is the only calculated variable that does not come from the feed directly. This variable will show the {{sale_price}} if its value is less than the {{price}} value and greater than zero. In other cases, it will return empty. Similarly, {{discount_percentage}} will show the number value (not including "%") if there are both the original price and sale price available in the product feed.
Available processor functions
Just like the default HTML only shows the price if it is available, you might want to add specific conditions to a variable or optimize its value for certain use cases. To do so, you can use the built-in helpers of the handlebars template engine and the processor functions listed below.
- sanitize - Lowercases string and replaces all spaces with - (sanitize Round Cement Planter => round-cement-planter)
- numeral - Getting numeral from float number (numeral 5.66 => 5)
- fraction - Getting fraction from float number (fraction 5.66 => 66)
- formatPrice - Formats number as price (formatPrice 5.66 => 5.66) (formatPrice 5 => 5.00)
For example, if you want to use as a class name to trigger different kinds of styling per product type, you can sanitize to ensure the value is formatted correctly.
Using CSS
In the CSS editor, you can select the different classes used in the HTML editor. Depending on your need, you can also rename classes in the HTML editor or add new ones.
For example:
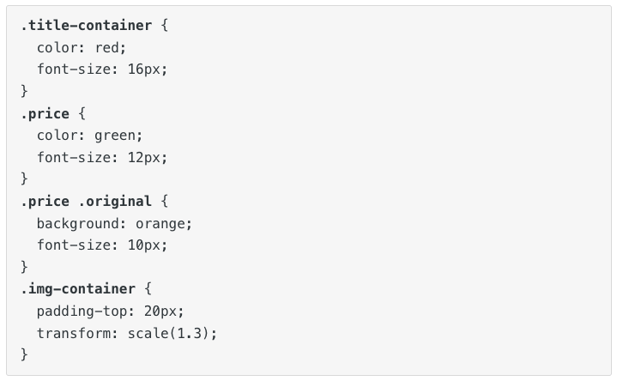
In this example, the bold parts refer to the classes found in the HTML of the default theme, and the following properties are respectively applied: The color and size of the product title and prices are adjusted, and the product image is zoomed in and repositioned.
To change the base style of the dynamic hotspot, to apply an overall background color, for example, select #publication .dynamic-hotspot:

Using custom fonts
There are two ways you can use custom fonts
1. You can use the Publitas custom font feature to use any font you like
Read here about Adding custom fonts in Publitas.
2. You can also use @font-face to apply a custom font. Instead of referring to the font hosted externally, the font needs to be embedded directly in the CSS content, converting it from WOFF to base64 encoded string.
Embedded font, where XXXXXXX is replaced with the base64 encoded string:

Tips and tricks
- Use a separate theme to test changes. To avoid publishing changes to live publications you can test new themes or changes to existing themes in a temporary theme.
- Take square product images into account. It is common for product images to be square. Depending on the product's dimensions and orientation, images can contain blank space impacting the layout. We recommend considering this and trying out the theme using various products.
- Resetting the HTML. If you delete the HTML from the Product Theme Editor, it will apply the default HTML again. Just refresh the HTML tab after you click Save & Apply.
- Create a larger working space. Use the ↤ arrow button at the bottom to enlarge the Editor and get a better overview of your code structure.
- Enabling images to always fit inside the hotspot. The default theme can zoom in on images when the hotspot becomes narrower. This is ideal for avoiding excess white space and making the products appear bigger. In case this does not complement your design, you can ensure that images always fit inside the hotspot area by adding the following code in the CSS part of the Theme editor:
img {
 max-width: 100%;
 object-fit: contain;
}
Examples
Libris.nl
Catalog: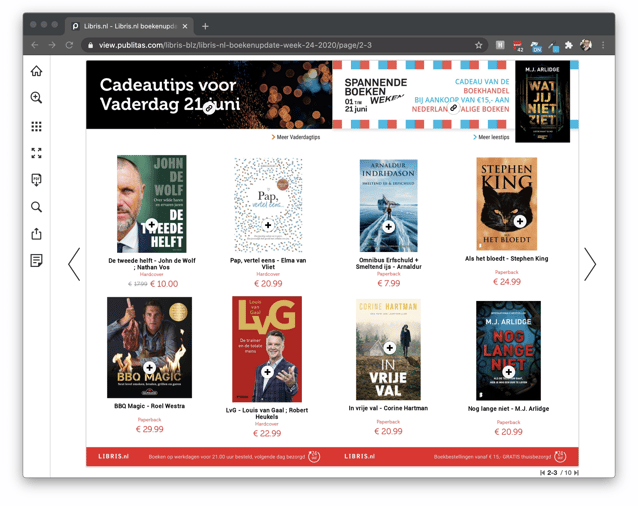
Product Theme:
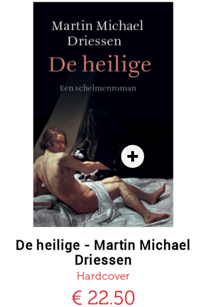
-------
Coop
Catalog: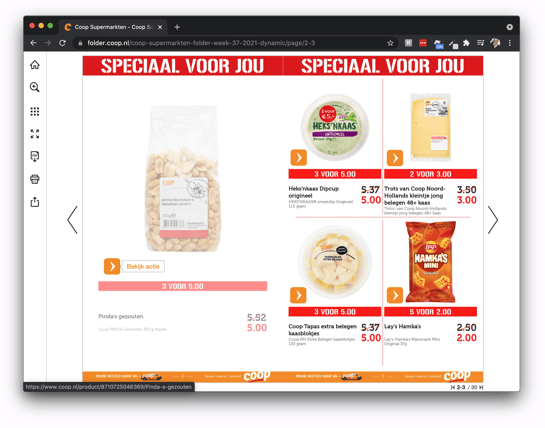
Product Theme: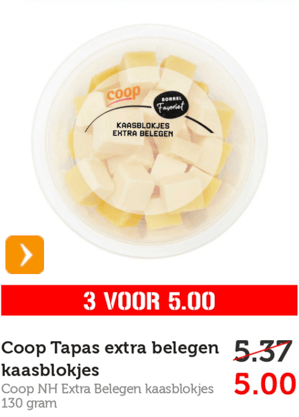
-------
Do It Center
For the second theme, the product images are added separately using Image hotspots.
Catalog:
0
Product Theme 1: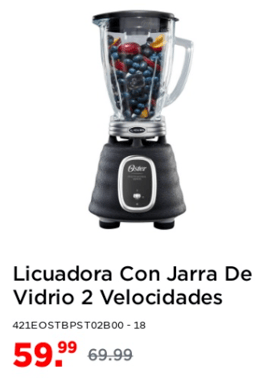
Product Theme 2:
