Available in Enterprise
When you're managing different brands or different markets in Publitas, it is likely that there are also different teams involved in managing the content for each of them. In Publitas, you can create separate users and provide the team members access to the publications and settings they are responsible for. Managing individual users is also important to keep your account safe (read more).
In this article:
User roles
On the Enterprise Plan, each user is assigned a role which determines the level of access they have to the account.
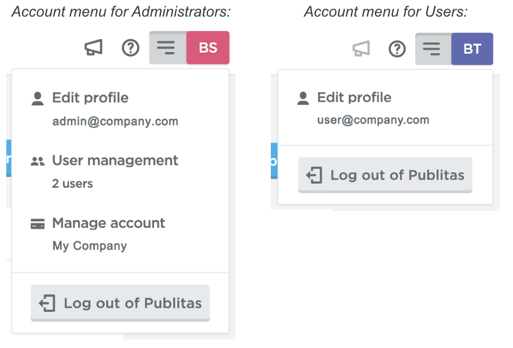
An administrator manages the Publitas account, having access to all groups, settings and account details. An administrator can also add and remove both groups and users.
A user has access to a selection of groups assigned by the administrator(s). Within these groups, the user has access to all related publications and settings. Users are not able to manage the groups or the users in the account.
Adding a new user
If you're an administrator on an Enterprise account, click on your initials in the upper right corner to open the account menu and select User Management.
- Click on Add new user
- Enter the full name of the new user
- Enter the user's email address
- Assign a role to the new user
- When creating a new User, also assign the groups the user needs access to
- Click on Send Publitas Invitation to finish the process
The new user will receive an email from Publitas with a link to activate the user account. This link is used to set a password after which the user will gain access to the account. For future sessions, the user can log in via app.publitas.com.
Creating a new user:
Resending the invite
The activation link is valid for three days, after which it will expire. In the second tab of the User Management menu, you can find an overview of the pending invitations. If the new user fails to activate the user account within three days, you can send a new link by clicking on the Re-send invite button next to the user's name.
Re-send the activation link: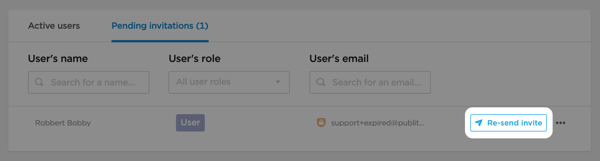
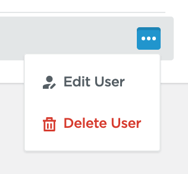
Editing and deleting a user
As an administrator, you can assign or remove groups for each user at any time. You can also change the name of the individual users.
If the email address of a user has changed, you can ask the user to update this in its profile: Updating your profile details
In case a user has left the company or is no longer required to have access to Publitas, you can remove the user from the account using the options in the user manager.
Editing options: