In this article:
- Introduction
- Step 1: Connect a custom domain to your publications
- Step 2: Configure the publication domains in the Data Stream
- Step 3: Connect your Google Analytics property to Publitas
- Step 4: Add custom dimensions to Google Analytics
- Step 5: Test the connection
- Step 6: Ask users for consent (optional)
Introduction
This article describes how to activate the Google Analytics 4 integration to start tracking your online publications. Following these instructions will have the online publications tracked in the same Data stream that is tracking your website. This cross-domain configuration is recommended by Google as it helps preserve user journeys. It also supports building catalog-specific audiences to understand how online publications drive conversion and leverage GA4's predictive insights.
⚠️ This setup works best if Enhanced Event Measurement is enabled in the Data stream.
Step 1: Connect a custom domain to your publications (embed only)
For Google Analytics to track online publications, embedded on your site, it needs the domain of both the website and publication to match.
Example:
When a publication, hosted on view.publitas.com, is embedded on a website hosted www.mydomain.com, Google Analytics will not record any data. If the embedded publication uses catalog.mydomain.com in its URL, Google Analytics will be able to track the publication.
This is why it is important to make sure that your online publications are published using a subdomain of your site's domain. Once a custom domain is connected to your publication, the embed code is also updated to use the new domain. Make sure to replace any previous embed codes with the new ones.
Click here to learn more about connecting a custom domain to your publications.
Step 2: Configure the publication domain in the Data Stream
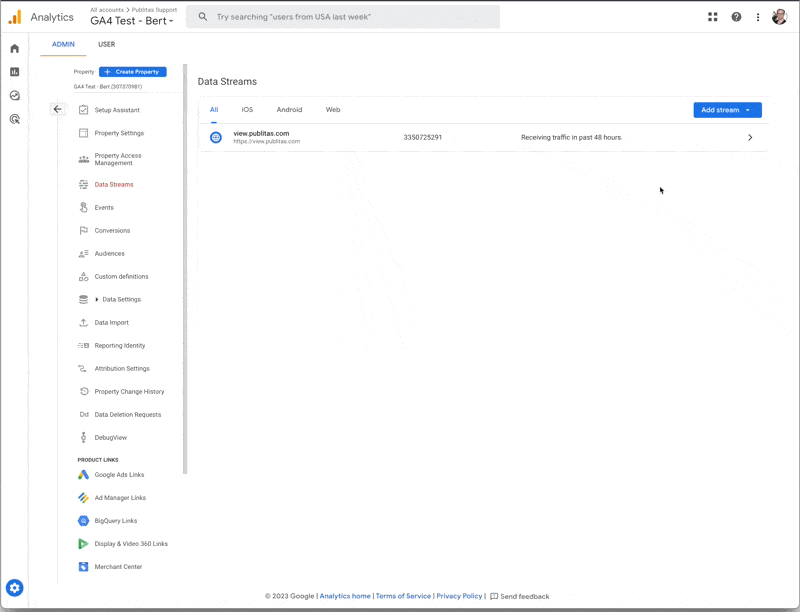
- In Google Analytics, locate the website's property in the Admin section and select Data streams
- Click on the data stream for web and first copy the Measurement ID
- Then, go to Configure tag settings near the bottom
- Select Configure your domains and add a condition where the domain exactly matches your custom publication domain
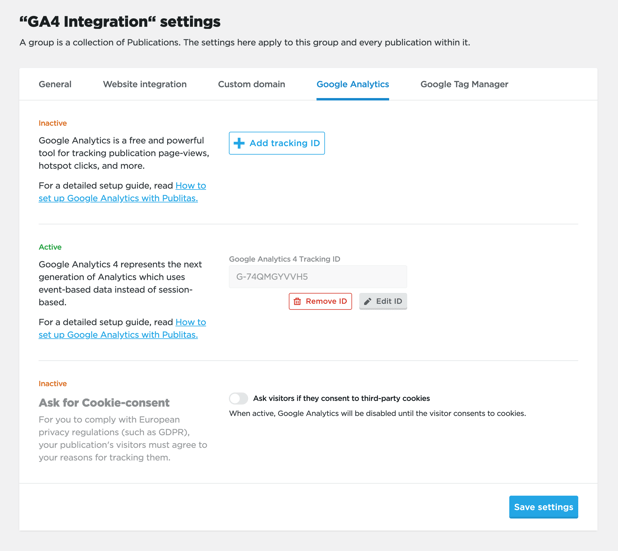
Step 3: Connect the Measurement ID to Publitas
To connect the Publitas to Google Analytics, open the Group Settings menu in Publitas and add the Measurement ID that was copied in the previous step. Make sure to store the changes by clicking on "Save Settings".
Adding a Measurement ID to connect Google Analytics: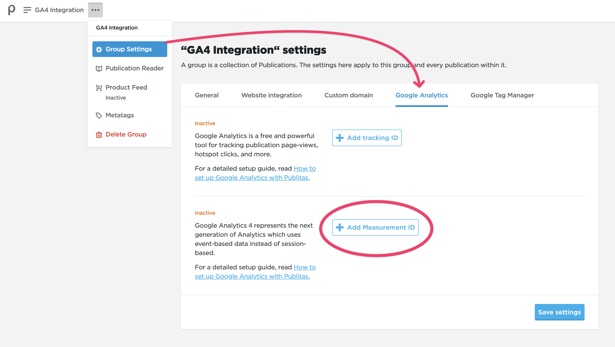
Step 4: Add custom dimensions to Google Analytics
IMPORTANT: Make sure to disable automatic translation of this page
           before completing this step.
Out of the box, all custom events are recorded by Google Analytics. Each event contains a set of event parameters to support advanced filtering of data in reports and dashboards. To record the event parameters as well, you'll need to add them as custom dimensions in Google Analytics.
In Google Analytics, go to Admin > Custom Definitions to create the following set of custom dimensions:
|
Dimension name |
Event parameter |
Scope |
| Publitas Collection Name | pbl_collection | Event |
| Publitas Event Action | pbl_action | Event |
| Publitas Event Value | pbl_value | Event |
| Publitas Group Name | pbl_group | Event |
| Publitas Page Number | pbl_page | Event |
| Publitas Product ID | pbl_product_id | Event |
| Publitas Product Title | pbl_product_title | Event |
| Publitas Publication Name | pbl_publication | Event |
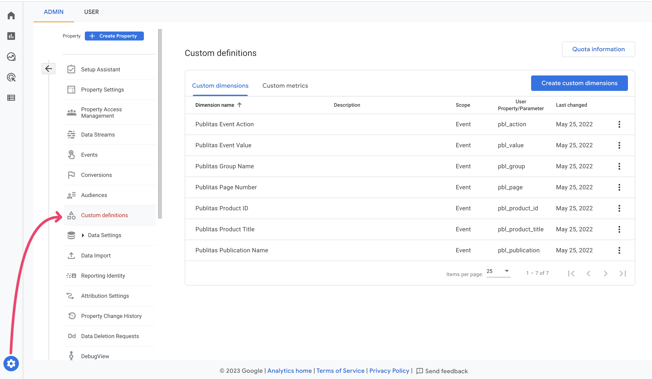
Click here to find all events and parameters recorded for online publications
Step 5: Test the connection
Once the setup is completed, your publications will be tracked by Google Analytics.
To verify the connection, open any of the publications to start a tracked session (make sure to provide consent if asked for) and go to Reports > Realtime in Google Analytics. Use the panel that reports 'Event count by Event name' and look for any event name that starts with pbl_. You probably need to go to the end of the list to find it. You'll know publication data is being received once you see any event with such a prefix.
Make sure to have a publication open somewhere while looking for active users: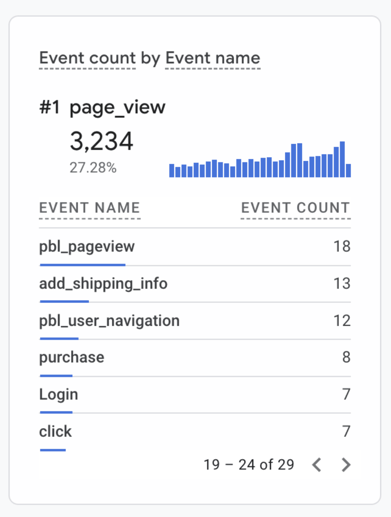
Check out all events and parameters recorded for online publications
Step 6: Ask users for consent (optional)
When asking users to consent to be tracked, Google Analytics will only start tracking once consent has been given. If no consent is provided, no data will be stored.
To optimize the consent request, you can change the banner text displayed when a publication is opened.
Enabling the option to ask for consent first: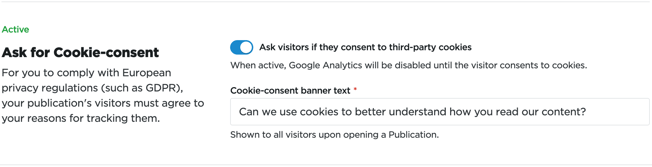
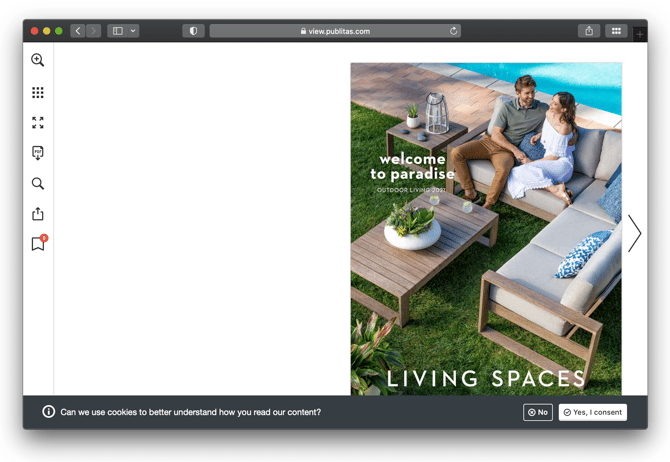
Preview of the consent banner: