
Available in Enterprise
If you're interested in using this feature and you're on the Enterprise plan, feel free to reach out to your success manager, who will discuss this further with you.
Overview
The image extension is a JavaScript library that dynamically overlays existing images with Spott interactivity on your website. This feature is ideal for dynamic content, such as WordPress posts or Instagram photo feeds.
After your web developers insert a script on each webpage, you can control which images to make interactive directly from the Spott App. Images are linked via an ID, which can be the standard Spott ID, an existing identifier on your website, or the image URL. This setup allows you to make most images interactive without additional development work.
Using Spott IDs
Step 1: Open the Embed Modal
Select the image you want to make interactive on your website. Click Publish and then click Overlay.
Step 2: Copy the Embed Code to Your Website
Copy and paste the code from the right into the head of your website. If using Spott IDs, set the "External references" toggle to false or change useExternalRef to false. This script should be included once on each page of your website.
Step 3: Add Images to Your Website
Ensure your HTML includes the class spott-image and the data-spott-id="id" identifiers. These settings can also be configured in the code from Step 2
Using images from Multiple Tenants
By adding data-external-ref-source="tenantID" to your images, the image overlay will automatically pick the correct tenant above the one set in your embed code. This allows you to create the following examples:

Using your own ID's
For content managers
Step 1: Locate the image you want to make interactive on your website and download it to your computer.
Step 2: Identify the external ID you want to use for this image. Right-click your image and click "Inspect." Now, look for the attribute your developer configured as the "idAttribute." This is the value you will need.
Step 3: Upload an image to Spott by dragging it onto the project page. After the upload is finished, click on it to go to the Studio.
Step 4: When you're in the Studio, open the Publish tab, where you can enter your External ID:
For developers
The library targets any HTML element with a certain class and unique identifier. The identifier can be the regular Spott ID or a custom id you chose.
Prepare every image on your website that you might want to tag with a class="spott-image" and a data-spott-id="uniqueID." The code shown below allows you to adjust both identifiers.
Please copy-paste the following code right before closing the </head> tag on the webpage(s) where you want to dynamically add asset markers.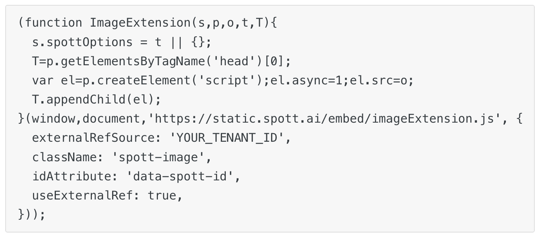
Using your image URLs:
For content managers
Step 1: Copy the Image URL
Locate the image you want to make interactive on your website. Right-click on the image and select Copy image address to copy the URL.
Step 2: Create a New Project
In our studio, create a new project using the copied URL or by uploading the image.
Step 3: Enter the Image URL
Navigate to the Publish tab within the Studio. Here, paste the image URL into the External ID field.
Step 4: Configure the Overlay
While still in the Publish tab, proceed to the Overlay section.
Additional Methods
Our script provides two additional global functions for more control:
initSpottsOverlays(): Automatically checks and overlays all targeted DOM elements that have not been initialized. This function is called when the script loads for the first time.initSpottOverlay(element): Manually initializes a specific element. The parameter should be a DOM element, such as one obtained viadocument.querySelector().