
⚠️ Universal Analytics no longer processes data for standard GA accounts.
For GA360 accounts, data will stop processing on July 1, 2024.
Make sure you connect your publications to GA4 to avoid losing data.
--
This article provides simple instructions to set up Universal Analytics tracking using Google Tag Manager. If you haven't connected Google Tag Manager to Publitas yet, check out Setting up Google Tag Manager.
In this article:
- Step 1: Import Variables, Triggers, and Tags into Google Tag Manager
- Step 2: Connect your Google Analytics Property
- Step 3: Connect a cookie banner or anonymize IP addresses (optional)
- Step 4: Configure the custom dimension in Google Analytics
- Step 5: Publish the changes
- Step 6: Start reporting
- Downloads
Wish to update to the latest version?
Following the steps below will also ensure that all current and future events are picked up automatically and tracked in Google Analytics.
Have you used this article before 31 January 2022 to configure Universal Analytics? We'd happily help you update your configuration to the latest version. Feel free to reach out to your Success Manager for more information.
Step 1: Import Variables, Triggers, and Tags into Google Tag Manager
- Download the settings attached to this article
- Go to the Admin section of Google Tag Manager
- Select Import Container
- Select the file to import
- Select the Existing workspace and select the default workspace (or select the one you prefer to add the changes to)
- Select to Merge the selected workspace with the content of the imported container
- Select Rename conflicting tags, triggers, and variables
- Click Confirm
Step 2: Connect your Google Analytics Property
There are different ways to connect the publications to Google Analytics. You can create a new property to track your online publications only, use the same property that is also tracking your website, or re-use the property that you had connected before using Publitas' built-in Google Analytics connection.
Creating a new property in Google Analytics
To create a new Universal Analytics property in Google Analytics, follow steps 1-9 in the "Connect Google Analytics to Publitas" chapter of this article.
Connecting the Universal Analytics in Google Tag Manager
- Go to the Variables section of Google Tag Manager
- Locate and edit the CS - UA Property variable
- Update the Value with your Tracking ID
- Click Save
Using the website property to also track the online publications
If you wish to track the publications using the same property already tracking your website, you can still use the Google Analytics Setting described above and apply the tracking ID that tracks your website. Make sure to review the settings and align them with your existing setup.
For example, custom dimensions 1 through 4 are configured by default. If you have already assigned custom dimensions, make sure to assign the dimensions to index numbers that are still available.
If you wish to use your own Google Analytics Settings, copy over all relevant settings and update all Tags to refer to the correct Google Analytics Setting variable.
Using a property that is or was connected to Publitas already
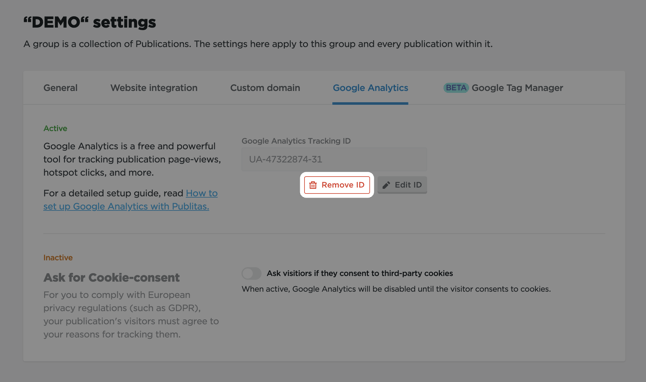
In case you wish to use the Google Analytics property, which you've already connected to Publitas, follow the steps stated earlier. Afterward, remove the tracking ID from Publitas to avoid each pageview and each event getting tracked twice.
Your historic data will remain available, but be aware that the Google Tag Manager-based setup uses different event names, and you might need to adapt your custom reports and dashboards accordingly.
Disconnecting Google Analytics from Publitas in order to connect Google Analytics via Google Tag Manager:
Step 3: Connect a cookie banner or anonymize IP addresses (optional)
The preset configuration is configured to track your users anytime a publication is viewed and identify unique users based on their IP address. You can ask users for consent before firing any tags (e.g., through Cookiebot). You can also have Google Analytics anonymize the IP address to avoid personal data from being stored, in which case it is no longer possible to identify unique and returning users.
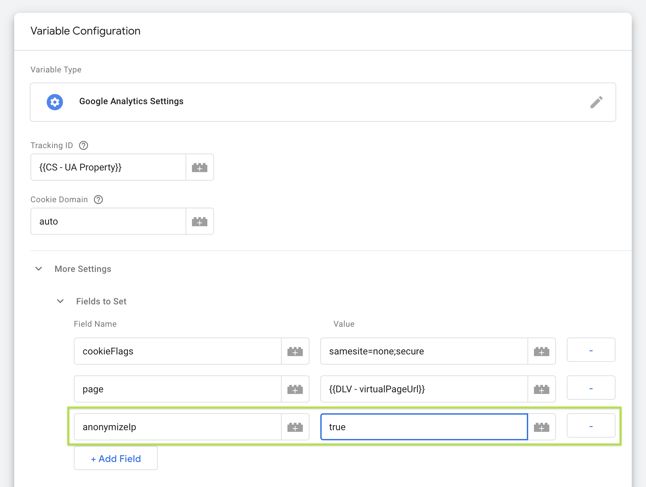
To anonymize the IP addresses, locate the UA - Google Analytics Setting variable, edit the Fields to Set, and change the value of the anonymizeIp field from false to true.
Configuring Google Analytics to anonymize IP addresses:
Step 4: Configure the custom dimension in Google Analytics
To help create useful reports and dashboards, the pageview configuration also sends over the publication name, page number, product name (Gold+), and group name (Enterprise only) to Google Analytics as custom dimensions. These can be used to, for example, filter the data for a specific publication or list the page numbers in your reports.
Use custom dimensions in your reports: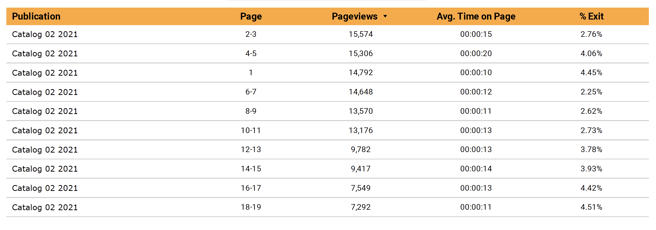
- Go to the Admin section of Google Analytics
- Select the correct Google Analytics property (middle column)
- Choose the option Custom Definitions > Custom Dimensions
- Add the following Custom Dimensions in order:
- Publitas - Publication (Scope: Hit)
- Publitas - Page (Scope: Hit)
- Publitas - Product (Scope: Hit)
- Publitas - Group (Scope: Session)
You can ignore the code snippets provided by Google Analytics in step 4; these are covered by Publitas.
Adding custom dimensions: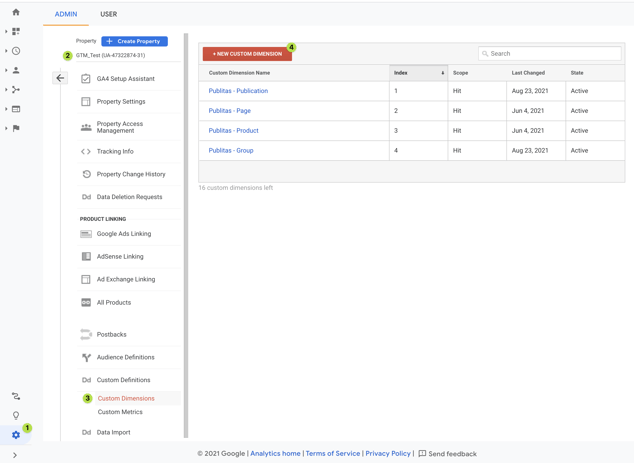
IMPORTANT: If you applied different index numbers to the custom dimension in step 2, make sure that the new custom dimensions are also connected to the corresponding index numbers in Google Analytics.
Step 5: Publish the changes
Once everything is set, you can use the Preview option in Google Tag Manager to validate that all events, page views, and custom dimensions are firing correctly. If you are happy with the results, click on Submit in Google Tag Manager to publish the tracking configurations and start tracking your publications.
Step 6: Start reporting
Once the setup is completed your publications will be tracked by Google Analytics. It can take up to 24 hours before the results are available in Google Analytics's standard reports. However, you can use the Realtime > Overview report to check whether the connection is working. Simply preview one of the publications found in the connected group and see if your session pops up in the report.
Use the real-time report to test the connection:
Also, check out:
- Using Google Analytics to find out how your publications are performing
- Setting up Cross Domain Tracking in Universal Analytics